

Many moons ago the lady I choose to refer to as, The Researcher, asked me to investigate 'yarn-over vs yarn-under'. At that time I had nothing useful to say. Time goes by, and I have become fascinated by the Tapestry crochet that Anna, aka 'Mmatildas virkstad', creates and the Scandinavian tradition that inspires her work. Tapestry crochet is something that (I thought) I could not do.
Before we go any further, let's make sure we all under stand the concept of yarn-over and yarn-under! When we make a double-crochet (Sc-US), we pull up a loop in the next stitch. The yellow loop, shown here, becomes the post of the new stitch. The green loop, which completed the last stitch becomes the top of the new stitch.
 At this point we pull through a new loop which becomes the top of our next stitch. In this image I am creating a 'yarn-over'. The yarn comes from behind the hook, it goes up over the back of the hook and down over the front. Then round the bottom to the back again. This is so basic that we do it instinctively with no thought at all!


To create a 'yarn-under', the yarn still comes from the back of the hook, but this time it goes down the back and up the front before being pulled through the stitch. This creates the post of the stitch.

There is a slight difference the second time we pull through a loop. Now the yarn is already at the bottom of the hook, so the the yarn is simply brought up in front of the hook and pulled through.
Now back to Tapestry crochet!
When you work Tapestry crochet you must work holding the right side facing forwards at all times so that you can carry the unused colours at the back of the work. This means you must work in the round.


When you work Double-crochet (UK, Sc-US, Fast maska- Swedish!) in rounds the stitch pattern quickly starts to lean to the right. How is this to be overcome?


I had it in my head, that working 'yarn-under' stitches would create a more upright pattern. As we have seen, in each Dc there are two opportunities to choose yarn-under or yarn-over. I worked up a swatch using yarn-under on both the post and the top of the stitch. I am convinced that the stitches stand a little straighter. You will notice that the stitches appear more like little X's than V's.


You may have read that yarn-under creates a stiffer fabric which is shorter and can be useful when making amigurumi. This is because the yarn takes a shorter path around the hook, and therefore you pull through less yarn for each stitch. With little effort, it is easy to increase the height of your stitches by pulling up taller stitches. The Dc still retains the crossed appearance because of the yarn-under technique. Rather like knitting, it tends to add a twist to your working yarn, rather than loosen it in the way that we crocheters are used to.


Here it is again worked into the back-loop-only. Possibly it is less successful than the green version?


Working the same, into the back-loop-only once again. I am convinced this is the solution. I shall test it with a larger sample worked, yarn-under on the top-loop-only and into the back-loop-only!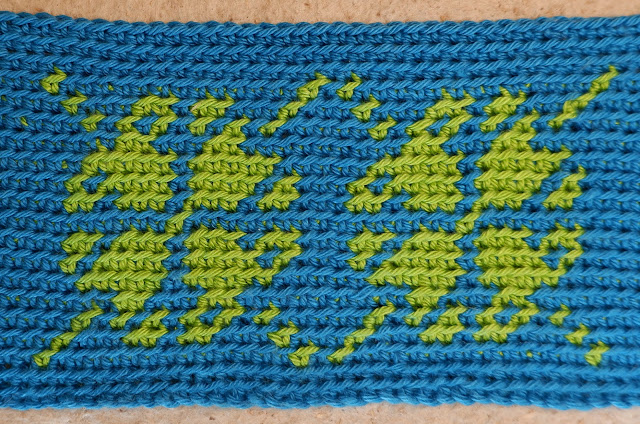

I am happy with this. What do you think?
I still have a lot to learn about tapestry crochet. On my squared paper this design was completely symmetrical. Rounder more curvy designs will work better than angular ones, says Anna. I need to be more Art Nouveau and less Art Deco!
It is only now that Anna tells me, it is actually possible to work tapestry crochet in turned rows! Guess what I will be experimenting with for the rest of the month?
Fastening off...
