


It was by no means easy. I needed to find a material that is heavy enough to make a substantial rug but light enough not to break the washing machine and flexible to fit inside the drum. The yarn has to be too big to get caught in dogs claws and strong to withstand a little rough and tumble. Finally I found Woolyknit's Chunky rug yarn. It comes in an enormous single skein weighing around 2kgs. The weight is important because there is a limit on the weight you can put in your washing machine. While my machine claims to take up to 6kgs in one load it can only handle 2kgs of wool.
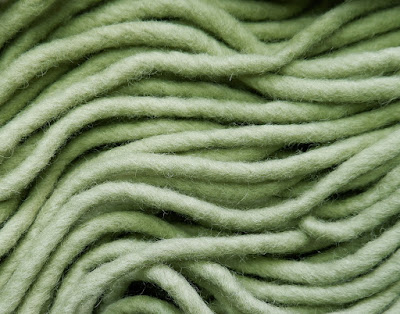 The yarn has a lightly felted construction and is about 5mm thick. While this absolutely will not get caught in a dog claw it poses new problems. It is not going to create long graceful crochet stitches without first breaking my arm. So where do I go from here?
 Rather than waste any of my precious yarn I grabbed the thickest yarn I had and started trying out stitch patterns. I quickly came to realise that slip stitches are perfect for this extra thick yarn.
 Eventually I was ready to make a swatch with the Rug yarn. But what hook size is right? Too large a hook and the work is loose flat and stretchy. Too small a hook and the work is tight, slow and hard on the hands. After a false start I went with the 15mm hook. By weighing the swatch and weighing the yarn I could work out the approximate number of stitches and rows I could make altogether. By measuring the swatch I was also able to decide on the ideal size for my rug. But before I started there was on more thing to do, wash the swatch. This yarn blooms slightly when washed. The yarn relaxes and puffs up, it also evens out the stitches.
 So no more excuses, it's time to begin. The plan is to work 51 stitches alternating Front loop, Back Loop slip stitch in each row. To make things simple I began and ended ever row with a front loop stitch. This way I could instantly tell if I had made a mistake and I didn't have to keep track of whether I was on a front or back row. I used a chain1 turning-chain at the start of each row. There was another false start when I realised the starting chains were too loose, making the first few rows wider than the rest of the rows. The turning chains were also too tall making the edges of the rug ripple. I came down to the 12mm hook for the starting row only and made sure to pull those turning chain tight. From there on it was plain sailing, once I'd realised that it was easier to work with a knife hold on the chunky 15mm hook. I finished the rug with a row of slip stitches so that both ends of the rug matched.
 When I had finished I washed the rug (and didn't break the washing machine). I laid it out on a couple of old towels. It required some stretching and manipulating before stoking it into shape from the centre outwards, but it dried quickly with nice even stitches.
 Shadow gave it his full seal of approval the minute I laid it down! In the past when I've tried something and it's gone wrong, I've given up thinking it was a failure. Now I see difficulties as problems requiring a solution. I hope I've given you some encouragement to solve something you're having difficulties with.
fastening off...

No comments:
Post a Comment