I hope you are ready for a challenge this month as we will be making some wild, weird and wonderful hairpin braids!
[Abbreviations used in this post:
Chain One- Ch1
Double Crochet- Dc (Sc-USA)
Left-Hand- LH
Right-Hand- RH
Front Left-hand Loop- FLL]
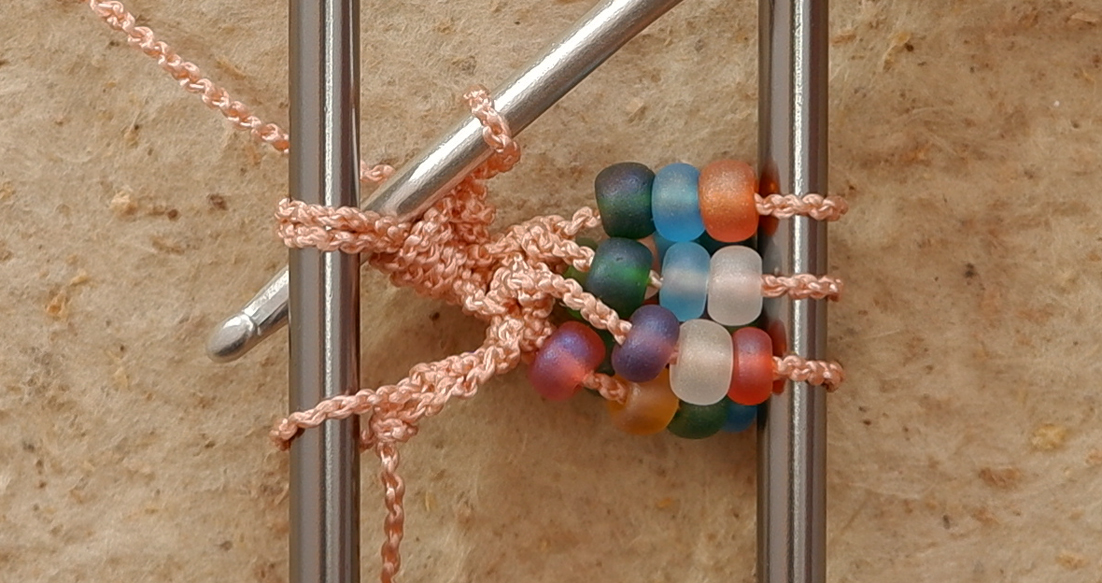
Multiple length BraidLet's start as we mean to go on with a three pin braid. The instructions I have for this braid tell me to hold two hairpins of different widths together at the same time, aligning the left hand pins. Besides the fact that this sounds almost impossible, frustrating and fiddly, I don't have two hairpins of different widths! But, I do have the Simplicity Boyle quad frame which allows for adjustable widths. So I added to it a 3.25mm knitting needle. For this technique we need the frame to be open at the top which makes it a little bit less secure than it usually is. So, Mr Pulledstitch suggested that I temporarily use a couple of tiny cable ties to lock the frame.
I'm making the stitches between the two darker coloured pins, with a long loop around the outer pin every other stitch.
I'm starting as we did for Basic Braid, with a slip-knot on the loom, around the left hand pin, catch the yarn under the work, pull up a loop and Ch1above the work. Work the first Dc (Sc-US) in the Front Left-hand Loop. (FLL from here on) *Remove the hook. Turn the frame, as if turning a page, from right to left, and allowing the working yarn to wrap around the frame. Replace the hook. Bring the yarn down between the two Left-Hand (LH) pins, then turn the frame as before. Dc in the FLL. Turn the frame, Dc in the FLL. Turn the frame allowing the yarn to wrap around the outer pin, Dc in the FLL. Repeat from * to the desired length.
You can choose the frequency of the long loops. Here I have worked one long and one short loop, but you could choose to work, say, two short and one long loop.
This braid is thick, perhaps it would make a good frill or edging. For this technique you need an open ended frame, with the open end uppermost.
Start as previously with the slip-knot around the LH pin, Ch1 and Dc in FLL. (without turning, wrap the yarn around the Right-hand (RH) pin from front to back and Dc in FLL) repeat once more.
[There are now 3Dc around the loop on the LH pin and 3 loops around the RH pin.]
*Turn the frame, allowing the yarn to wrap around the frame, bring the hook up and under all 3FLLs at the same time and make 1DC (without turning the frame wrap the yarn around RH pin and Dc under all FLLs together) repeat once more.
[There are now 3Dc around the 3 loops on the LH pin.] Repeat from * to the required length.
While you could use this technique to create a fabric or insert, edging one side with slip stitches creates a perfect fringed edging. Start as previously, with a Slip-Knot around the LH pin and the working yarn around the RH pin, but this time keep the knot close to the LH pin.
Ch1 and Dc in the FLL as close to the LH pin as possible. *Turn the frame
Bring the hook up under the FLL, catch the yarn and pull up a loop, [2 loops on hook]
Yarn over the hook (YO) [3 loops]
Place the hook under the FLL again, catch the yarn and pull up a loop, [4 loops]
YO the hook and pull through all 4 loops on hook.
Turn the frame and Dc in FLL as close to the pin as possible. Repeat from * to the required length. The braid can be used as it comes off the frame but adding a slip-stitch in each of the short loops it creates a very usable edging.
Fringed Braid
Simply adding cut lengths of yarn to the loops of the Asymmetric Braid creates a more joyous fringe! Indeed you could do the same to any of the braids we've made so far. Personally I think keeping the loops short before adding the tassels looks better.
Now that I have introduced the idea that we can use the Hairpin frame in different ways, here's a method the Victorians used to create a quick yet delicate edging lace. Traditionally the lace was made using a delicate crochet thread, and the result can easily be mistaken for tatting.
It requires a narrow open ended Hairpin held with the open end uppermost.
Start with a slip-knot loop dropped over both pins, with the knot at the back and central, catch the yarn under the loops, pull through and Ch1 above the loops.
Do not turn the frame.
*( Put the hook under the FLL,
using the left hand, wrap the working yarn around the outside of the LH pin, from front to back.
Catch the yarn from behind the pin, pull through the loop and work a Dc) Repeat until there are 5Dc running up along the inside of the LH pin. Ch2 between the pins.
Turn the frame from the left to right so that the yarn wraps around the empty pin from front to back. Remove the hook and reinsert from the front.
Put the hook under the FLL, catch the yarn from behind the pin, pull through a loop and make a Dc.
Repeat from * to the required length.
Endless possibilities are possible by altering the number of Dc per side and by adding, removing or linking the crossing chains.
This 2nd example is made as follows; *make 7Dc on one side of the frame, do not add any crossing chains, make 7Dc on the other side of the frame, make a Slip-stitch over the last crossing and repeat from * to the required length.
Even if you never intend to pick up a Hairpin frame, I hope you are enjoying these examples of the versatility of crochet...


 ... and Chevrons!
 In this example I have gathered the loops with a Dc and placed a Treble (Dc-US) into the spine between the groups.