


There are a few images in the Therese De Dillmont Encyclopedia that I have become so familiar with without actually realising what I was looking at. The wording 'crochet lace with mignardise', finally broke open this secret.
So you'll be wanting to know what 'mignardise' is. It has nothing to do with small sweet treats served with coffee. A google search was quite fruitless to start with, even when I added the word 'cordon', which coincidentally had nothing to do with French cooking or lines of Police. Searching for 'braid' was equally fruitless as all I found were military uniforms and hairstyles. Thankfully the learned Cary Karp from the Loopholes blog let me in on the secret.
 |
| English Braids for Irish Lace. |
Not instantly coming up with the solution has actually meant I have more information than I could ever have imagined. For instance, I am currently working on the premise that crochet did not instantaneously spring up in the 18th and 19th centuries as a development of Tambour work. Instead it emerged from obscurity and grew in popularity due to it's ability to mimic other forms of work. In an 1883 edition of The Girl's Own Paper, the unnamed author tells us that 'crochet itself came out as a more rapid imitation of lace.'

Sadly, the required mignardise braids are not easily found today, if at all, but there are various ways that we can replicate this work. To do this, we must first discover what lace-work fancy-braid crochet is trying to replicate. The list, you might be surprised to discover, is quite a long one. Although I recognise it as Irish Lace it seems frequently to be compared to Honiton Lace, which are both Tape or Point lace. A quick search leads to a seemingly endless list of leads to follow. For our purposes I shall describe it as; woven tapes tacked and pinned into shapes and designs which are then permanently set in place with needle made stitches, creating a webbing of bars and net. According to my brief research this type of lace was developed in the 17th century but found it's heyday in the 19th.

This is a detail from my Mum's best table cloth. To be honest, I can't imagine ever having an occasion to use it. Except today of course, when it is serving as a modern illustration of Lace braid work! What can we do if we want to bring this fancy-braid crochet into the 21st century? Well, plenty it seems! There are still braids, laces and trims that we can repurpose. There are various ways we can make our own, and there are ways to repurpose the crochet skills we already have.


Here are some modern trims that I found. The Braid is called gimp braid. While it is very chunky, all the authors from past eras tell us to match the weight of yarn to the braid. Personally I've never liked Ric Rac braid, but our unnamed author from 1883 tells us that this can be 'used for the trimming of children's under linen' and makes 'a durable edging'.
Dillmont tells us that, 'a chain like this makes a very good substitute for mignardise when that cannot be got of the right size or colour for the required purpose.' Besides this, she also gives us Lace Picots,
and Hand-knotted cord, or, should you be feeling adventurous, you could make your own pillow lace!

 |
| Double Chain |
 |
| Crochet Lace Picots |

 |
| Plaited Pillow Lace Braid |
Now let's see if any of this is at all possible!

Chain2,
put the hook under one loop of the first chain, Yarn Over, pull up a loop,
Yarn Over and pull through both loops on hook,
*put the hook into the left-hand loop of the stitch, YO, pull up a loop,
YO and pull through both loops on hook,
Repeat from*.

*Chain3,
the loop on the hook will become the picot, so pull the last-chain-made tight, remove the hook,

put the hook in the 2nd-chain and then the 1st-chain at the same time,


Repeat from *.

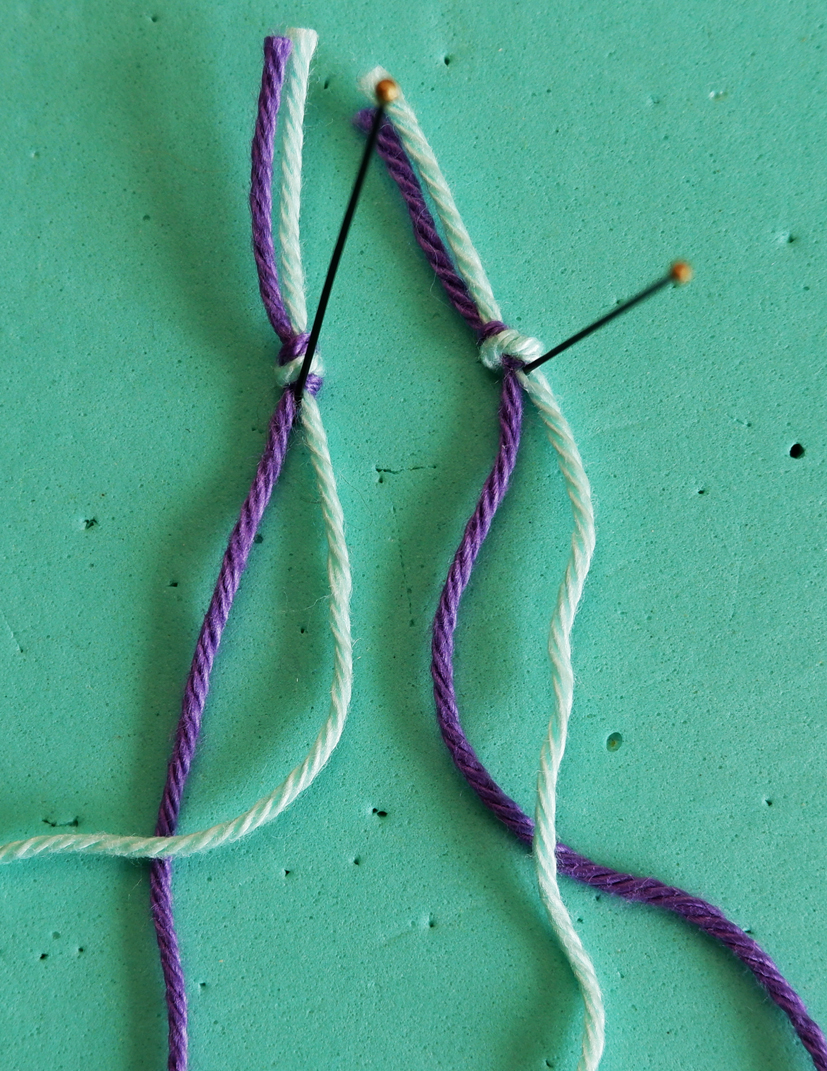
Making this for the first time it helps to use two colours until you get a rhythm.
Take two lengths of yarn and knot together.
Cross the two threads with the left underneath, as shown.


At the same time, drop the loop from the right hand and pass the knot to the left hand. Tighten the old loop with the right hand.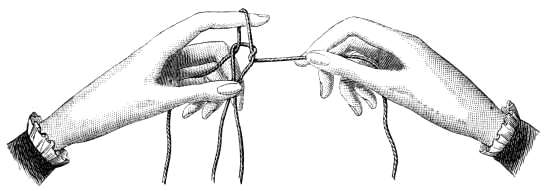 Next work the same movements with the right hand. Put the right forefinger into the loop from the left, hook the thread coming from the right hand, pull it forward.
 Drop the loop from the left hand and pass the knot to the right hand. Tighten the old loop with the left hand.


Repeat the motion of hooking and passing the cord.
It took me some patience and practise to get an even cord!

To make the plaited pillow lace:
Not having any equipment to make this I used a blocking mat and pins.
Start with two pairs of two threads, each pair knotted at the end and laid side by side.
1. Cross the right thread of each pair over it's left of it's pair.
2. Cross the inner threads as shown, left over right.


Repeat these two steps.

If you would like picots; form the outer threads into picots, pinned in place, at regular intervals. I decided this was too advanced for my first voyage into pillow lace and that the finished braid is fine as is for our purposes. I can honestly say that pillow lace is not for me!
Now that we have our substitute mignardise it's time to experiment.
Thinking about how to use the braids it strikes me that there are a number of ways to view the Victorian patterns.
Firstly, crocheting onto a stable braid makes an easy way to attach stretchy crochet to a more stable fabric, like a pillow or towel edging. Both of these designs are worked onto gimp braid. In the image below I chose to work into the back for a simpler, less fussy design.

 Above, the cotton lace would also create a stable base for sewing onto a fabric. While the hand-knotted cord, below, also gives structure to the light weight crochet design.


Placing the stable braid between rows of crochet means we can sew the lace anywhere onto a garment, as if it is a decorative trim rather than an edging.


Obviously, we can use the lace to incorporate a more intricate element within the crochet design for visual interest.


And finally, we can use the braid to mimic Honiton Lace. Above, our modern picot edged foundation is encapsulated within rows of crochet in place of the Victorian braid in this 19th Century design.


And finally, we can use the braid to mimic Honiton Lace.

Below, I have used the Double Chain to create a delicate Ric Rac braid within symmetrical rows of crochet. This could be used as a decorative trim as it is, or included as an element within a larger crochet design.


I have kept my designs relatively simple leaving the possibilities to your imagination. I shall fasten off with the wise words of our Victorian Author; "Not that we aspire yet awhile to anything so elaborate; we should be at the top rung of the ladder at once if we did."
Fastening off...

I have seen things similar to these examples and never understood them, now you have made me look at them with new eyes! Everything is interesting when you learn about it.
ReplyDeleteThis is exactly how I felt: Oh! now it all makes sense! It's a bit like putting a jigsaw back together.
ReplyDeleteThank you for reminding me of this marvellous usage of crochet. There are so many possibilities for the central braid: hairpin lace, lucet cord, knitted i-cord (with a knitting doll or otherwise), kumihimo braid, tablet woven inkle... I want to start experimenting immediately. :)
ReplyDeletePS: I'm with you on pillow lace. I make needle lace and knotted lace but I refuse to make pillow lace, my work should not be more comfortable than me!
Thank you for your enthusiasm and for the funny comment that made me laugh!
ReplyDelete