Sorry about the pun! What happens when you need to join in a new ball of yarn? It's another of those things that experienced crocheters forget that they had to learn. There are lots of alternatives, here are the ones I've found.
Don't Join
This isn't always practical but it's the most simple.
Simply fasten off at the end of the last row or round and begin the new yarn at the start of your next row or round with a Standing Stitch.
No Join
Join in the new yarn in the same way you would make a colour change. (I will be making a separate post about colour changing.) This is one of those times when you really need a third hand, but after a little practise it'll get easier! I prefer this method when using a thick yarn.
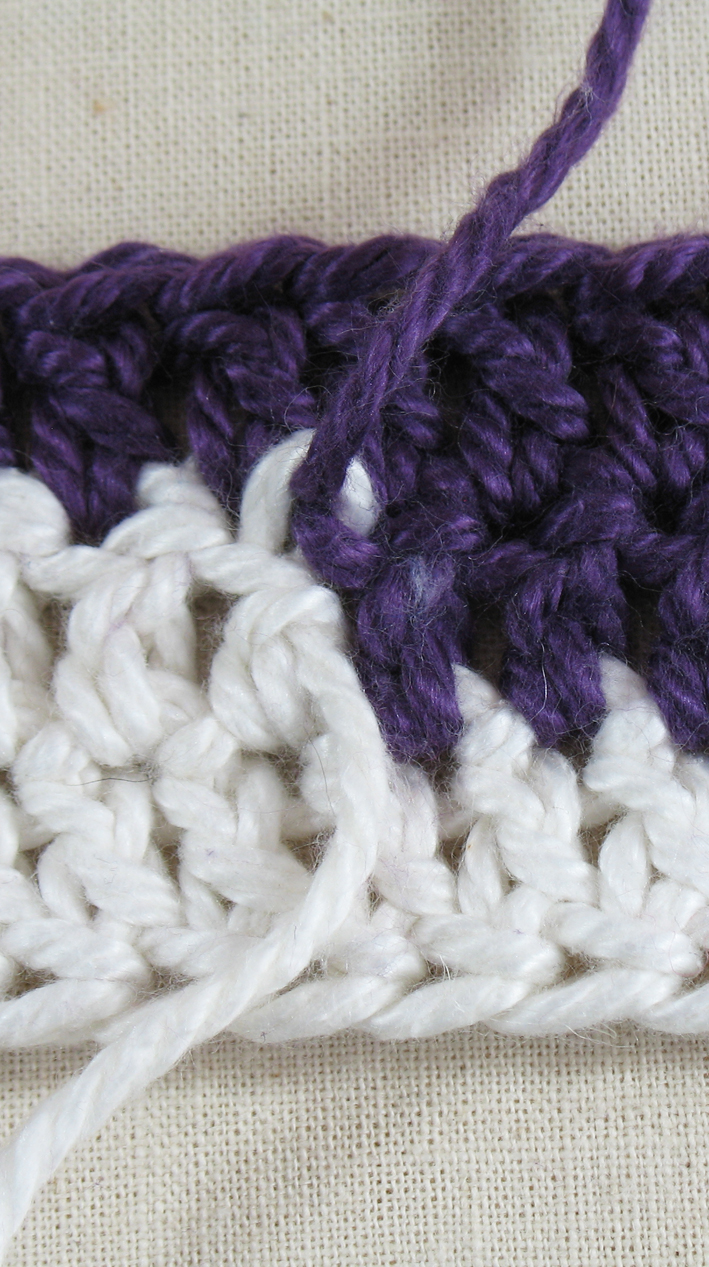
Before the working yarn runs out, hold the new yarn at the back of the work and start to crochet over it. Leave a good tail to sew in later.
(In the photo I am showing you the back of the work.)
You are going to join the new yarn at the last pull through of the stitch. So in these double crochet stitches, pull up a loop from the existing yarn and on the last 'yarn over and pull through both loops on hook', use the new yarn.
Now continue working with the new yarn, while holding the old yarn at the back of the work and crocheting over it.
Leave yourself a good tail to sew in later.
Temporary Knot
I like this method because sometimes the best solution to problems are the most simple!
Tie your new yarn in a temporary knot, make it big and loose and keep it at the back of your work as you crochet past it.
When you are ready to sew in your ends, simply unknot and sew in!

Felting
You can only use this method if you are working with a wool based yarn. The best thing about it is that there is no sewing required after.
Using a needle unravel a good length of both the working yarn and the new yarn. The bigger the join, the stronger it will be.
Wet both ends, lay one over the other, and roll backwards and forwards under your fingers on a hard surface, felting the ends together.
How long did it take you to spot the join? Now just continue to crochet.
Magic Knot
This is another no sew method, if you're making something which will hide the knot. It's basically two knots pulling against each other.
(I was never in the Girl Guides so sadly I don't know the name of this knot. Nick says that it's not a knot and therefore has no name!) Simply tie the new yarn to the old yarn, and the old yarn to the new yarn as shown!
Pull the knots tight.
Take hold of both the new and old yarns and pull the two knots together.
Pull together tightly and trim the ends.
Russian Join
I'll hold my hand up and tell you that I am far from expert at either this method or the next. I am currently working with Scheepjes Whirl, I think the colour changes are tied in, in one of these methods. They are definitely worth practising if like me you tend to work with cotton based yarns.
Thread your yarn onto a needle and then work the needle into the centre of the threads.
This is the hard bit, pull the needle through the yarn leaving a small loop at the top.
Thread the other yarn onto a needle. Feed the needle though the loop of the first yarn. Then work the needle into the centre of the threads as before.
Pull the loops tightly closed and trim the ends at the last moment before crocheting into your work.
Braiding
There are some variations to this technique and there are some excellent videos on youtube which are worth looking at.
Using a needle split the end of one of the yarns into 2 pieces.
You will need to hold the two yarns together in some way temporarily.
Start to braid the yarns together in exactly the same way as you would braid hair.
Trim the loose ends at the last moment before crocheting in.


 From the Front...