Search This Blog

Thursday 15 December 2022

How to make a Crochet Wreath


In the seemingly, now traditional, season of blind panic, I bring you 'How (Not!) to Crochet a Winter Wreath'.
Last year, one of my sisters foolishly made the mistake of mentioning that she would like a Winter wreath. Now, that's the sort of information that a crocheter squirrels away!
 
Living in the Northern Hemisphere, where it is so cold and dark right now, I have often wondered what it must be like to celebrate Christmas with a beach barbecue at the height of a Southern Hemisphere summer. How strange that must be! 
There's a reason why, as Northerners, we have always had a winter festival.  Long before the advent of tinsel and electric fairy lights, we have always brought life and light into our homes at this the darkest time of the year. After all, Stonehenge was built to mark the winter solstice, the dying of one year and the birth of a new one.
Knowing absolutely nothing about making wreaths I set out with plenty of time to spare. Having no idea where to begin, I reverted to my Art school training and began with some research.  I bought both books; Crocheted Wreaths for the Home by Anna Nikipirowicz, and Crocheted Wreaths and Garlands by Kate Eastwood. Then I had some deep thoughts. 
 
What sort of thing would my sister like? I think, I hope, she would like something traditional and organic. I started to think about the Holly and the Ivy. Christmas green and red. I tried out several patterns for the leaves but didn't really like any of them. I was looking for something as realistic as possible. Eventually I found patterns for Holly and Ivy in Lychette's Etsy Shop. Although the patterns are intended for crochet thread they work just as well with any yarn. I blocked the leaves using starch to stiffen and shape the different elements. I was able to make my ivy leaves more pointy and the mistletoe more droopy. By carefully folding and crimping the holly with my fingers, I was able to give it more life. Even the mohair snowflake looked better with starching and blocking.
There's a Christmas tradition of kissing under the mistletoe. It's not exactly Christian but comes from Greece and the festival of Saturnalia, which was celebrated at this time of the year. So I thought my wreath should have some mistletoe as well. Kate Eastwood's book has a pattern which I tweaked slightly before moving the berries to where they aught to be. Here in Herefordshire mistletoe grows everywhere. I am so used to seeing it that I assumed everyone was as familiar with it as I was. Then I discovered that the Welsh Marches is the place to go to find some, which is exactly where I live, in the borderlands between England and Wales!
I have Robins in my garden all year round, so why
are Robins associated with Christmas? The giving of Christmas cards began in the Victorian era. At that time the mail was delivered by red waist-coated postmen, nicknamed Robins! So there better be a Robin on my wreath. I used the design by Vanessa Mooncie.
So now I had my elements and I had a very particular image in mind. I saw the ivy twining around the Robin nestled in Holly beneath the falling snowflake. But no matter how I shuffled things around nothing felt satisfactory. So I went back to that research, that I mentioned earlier.
I tried to work out what made a good wreath. It seems to me that there are two main types of design. There's a kind of cornucopia design where the wreath is smothered in lots of the same type of motif. These are usually very simple but impactful, be it bees, pompoms, flowers or snowflakes. In the other type of design the ring forms a picture frame which holds a vignette for what ever season or event is being celebrated.
There are also two types of base wreath. Like the grapevine hoop, below, some are flat and work best covered with motifs. The other, like the bleached willow, is more rounded and works well as a frame. Larger elements, like the Robin can sit inside or on top, or hang down with in it.
What I had done was to create a vignette and a cornucopia at the same time! I'd set off with one idea in my head and now I had to face up to the fact it wasn't working. It was time to get tough with myself. I needed to let go of the unnecessary items that were getting in my way until finally I had a design that worked. 
Finally all the hard work was over, right? 
No! not yet. Both the books told me in no uncertain terms to use a glue gun to attach crochet to the wreath. I am useless with a glue gun, it runs away with me and trails glue everywhere. The last thing I wanted was to throw glue all over my carefully crafted leaves. Instead I tried to sew them in place. This proved to be so very very hard and in the end it looked awful. Fortunately sewing is really easy to unpick! Patiently and very very cautiously I applied glue to one item at a time before carefully setting it in place. 
 
I'm not so scared of the glue gun now! 
Let's just hope my sister likes the result...
So where ever you are right now, whether North or South, whether you're relaxing on a beach or curled up in front of a fire...
 
Seasons Greetings!

Fastening off...


Tuesday 15 November 2022

How to create Crochet Ribbing.

I have more than a few questions about Crochet Ribbing, so in established Pulled Stitch tradition I have set about exploring the topic. As a non-knitter slapping on a knitted rib cuff is simply not an options, so let's take a look at what is available.
I have discovered five solutions for you. I'm beginning with the most commonly used and finishing with something special!
 
Post Stitch Ribbing
This is the first type of ribbing that I learnt on my crochet journey. But is it a ribbing?  Should we call this faux ribbing or perhaps pseudo ribbing?
 
So, if Post Stitch ribbing is a faux ribbing perhaps we should ask ourselves what we think ribbing is and what it's purpose is. Undoubtedly what we want from our ribbing will vary from project to project. I am going to begin with the idea that we want to reduce the circumference of our main fabric, like at a waistband. We might also want something stretchy as on a sock cuff and also for it to hold it's elasticity so that our socks don't fall down!

The post stitches create a ribbed look but they do not stretch. They do, however, reduce the circumference of the main fabric slightly. Post stitches create a very heavy chunky fabric. They work well when what we want is to create is a warm cowl or neckline. 
 
To create this cuff you work in joined rounds, so the join needs to be in the least obvious place like the inner seam of the sleeve.
Usually the pattern begins with a round of Treble stitches (UK) (Dc-US). So,
Rnd1. Chain2 in first stitch, work a Treble (Dc-US) in each stitch around and join to Ch2 with a slip-stitch. Turn.
Rnd2. Ch2 in first stitch, (Front Post Treble, Back Post Treble) (FPDc,BPDc-US) around, join to Ch2 with a Slip-stitch. Turn.
Repeat Rnd2 to the desired length.

Back Loop Ribbing
This is the point at which I really wish we all spoke the same crochet language! So! UK-Back Loop Double Crochet Ribbing, US-Back Loop Single Crochet Ribbing.
This type of ribbing seems to have become increasingly popular, it certainly has the ribbed look. There is some stretch but no elasticity. In my example here the edging has actually ended up wider than the original fabric. I'll talk about how to adjust this in a moment.
 
This stitch is made by working in short rows of Double crochet (Sc-US) worked at 90o to the main fabric. The number of starting chain determines how long the cuff will be. I worked this example as follows...
 
Setup;
Slip-stitch join to a stitch on an inconspicuous part of the main fabric. Chain8.
Turn 90o, Double crochet in 2nd chain from the hook and in each chain to the end. [7Dc]
Double crochet 2together using the next 2 stitches on the main fabric.
Short row repeat;
Skip the last stitch made and Back Loop Double crochet in each of the 7stitches to the top of row, Chain1 and turn,
Back Loop Double crochet in each of the 7stitches to the bottom of row,
Double crochet 2together using next 2 stitches of the main fabric.
 
Repeat these last instructions around the cuff, collar or hemline. At the end either slip-stitch join to the starting chain from the inside or sew together for the most invisible join.

How could I have made this ribbing tighter? 
Obviously I could have opted for a smaller hook size.
Or, I could have adjusted the number of stitches I worked into on the main fabric. So, instead of Double crochet 2togther, I could have tried 3together.
Or, I could have reduced the number of stitches in the last row of the sleeve before starting to work the ribbing.
 
Flat Ribbing
If we took an iron to our Double crochet ribbing this is what it might look like! That's because it's a combination of Back Loop Double crochet ribbing and Slip-stitch ribbing.
This ribbing is very neat and it does reduce the circumference of the sleeve. It may be slightly more elastic than the Back Loop Ribbing above. However
it has a peculiarity in that it leans slightly to the right.

Once again this stitch is made by working in short rows worked at 90o to the main fabric. The number of starting chain determines how long the cuff will be. I worked this example as follows...
 
Setup;
Starting on the Right Side of the fabric, Slip-stitch join to a stitch on an inconspicuous part of the main fabric. Chain9.
Turn 90o, Double crochet in 2nd chain from the hook and in each chain to the end. [8Dc] 
Slip-stitch into each of the next 2 stitches of the main fabric, turn.
Row1. Wrong Side. 
[I'm going to ask you to do a weird thing now to avoid the working yarn trailing and making an unsightly lump on the front of your work. Turn the work so that the working yarn is in front of you, then take the yarn to the back between your hook and the ribbing, over the 2 slip-stitches you just made.]
Skip 2 slip-stitches, Back Loop Slip-stitch into each of the 8 double crochet, Chain1 and turn.
Row2. Right side.
Skip the chain and Back Loop Double crochet into each of the next 8 slip-stitches, 
Slip-stitch into the next 2 stitches of the main fabric, turn.

Repeat rows 1 and 2 around to the start. The neatest join is achieved by needle joining into your starting chain stitches.

The back loop slip-stitches in this pattern need to be made reasonably loosely as you work back into them. If you have not used Slip-stitches in this way before the post I wrote here might be helpful.

Slip-Stitch Ribbing
It's my opinion that Slip-stitch crochet creates the most successful and most stretchy ribbing. It just takes a little practice and patience.
You can see that this type of rib noticeably reduces the circumference of the sleeve while still allowing it to stretch over my hand. It will loosen it's elasticity with wear, but regain it when washed.
 
We are of course working in short rows, made at 90o to the main fabric. The number of starting chain determines how long the cuff will be. I worked this example as follows...  
 
Setup;
Slip-stitch join to a stitch on an inconspicuous part of the main fabric. Chain9.
Turn 90o, Skip the first chain, Slip-stitch through the top loop of each chain  to the end. [8 Slip-st] 
Slip-stitch into each of the next 2 stitches of the main fabric, turn.
 Row1;
[When you to turn the work and the working yarn is in front of you, take the yarn between your hook and the ribbing, over the 2 slip-stitches you just made.]

Skip 2 slip-stitches, Back Loop Slip-stitch into each of the 8 slip-stitches to the top, Chain1 and turn.
 
Row2:
Skip Chain1, Back Loop Slip-stitch into each of the 8 slip-stitches to the bottom,
Slip-stitch into each of the next 2 stitches of the main fabric, turn.
 
Repeat rows 1 and 2 around to the start. The neatest join is achieved by needle joining into your starting chain stitches.
 
Elastic Ribbing
I had read that it was possible to hold a fine elastic thread along with your yarn when crocheting a rib to create something which remained stretchy. I imagined that it would be difficult to work but had never tried, until now! It is possible to get the elastic in various colours so that the elastic won't be too obvious. Ordinarily a slightly darker shade usually works best just as it does when choosing thread for sewing. For this illustration I used a black elastic so that you can see it.
The ribbing is worked in exactly the same way as the Back Loop Slip-stitch rib. I just held the elastic thread and the yarn together as I worked.
This is my first attempt and you can see that the ribbing is tighter. It has less stretch but more spring! What I learnt was that I should have gone up a hook size. So I decided to have another go.
When I finished I simply cut the elastic leaving a long tail and wove it in, in the normal way just as I did with the yarn ends.

Next time you see a ribbed cuff, collar or hem in a pattern you get to choose how you would like to make it!

Fastening off...


Saturday 15 October 2022

Double Helix Mat


    If you've been reading my recent blog posts you will know that I have been on a mission to make some machine-washable rugs. Now I do like a circular rug, don't you? But here's the problem, how do you make a circular shape using only slip-stitches? How many increases do you use? How do you increase using slip-stitches? These are the kind of questions that used to keep me awake at night, but not any more! Let me tell you how I found the solutions.  
    Although slip-stitch crochet is sometimes referred to as Shepherd's knitting or Bosnian crochet it is one of the oldest types of crochet and appears all over the world. So, I was surprised to find very little information to solve my problems. Faced with this wasteland of knowledge there is only one thing to do and that is to get out the hooks and yarn and start crocheting.

        Let's cut through lots and lots of swatching and tell you what I did! I started with a 'reverse slip-knot'. Just in case you haven't met this useful trick before, you simply hold the yarn the opposite way round when forming the knot. So hold the tail end in the hand which normally holds the working yarn and make the knot. By doing this you can tighten your first stitch by pulling on the tail.
    Next I made six chains. Six, it turns out, is the number of increases we need per round and working in a continuous spiral turned out to be the easiest way to go. So, I don't join the stitches into a ring.

   Back Loop Slip-stitch is the easiest type of slip stitch to use, so let's go with that! Making two slip stitches in the same stitch is how I made the increases. It feels odd but it is the secret behind the swirl. So, for round two I made two Slip-stitches into the back loop of each chain. Now I can tighten the tail of that slip-knot to reduce the size of the first chain. It helps to form the start of the spiral and close up the centre of the rug.
 
    As you know if I place my increases as per the standard formula I will end up with a hexagon. I showed you another solution back in November last year. It's better but after a while it gives you a Dodecagon, a 12 sided polygon. I am not great with maths and I cannot even begin to work out this conundrum. My brain simply refuses to work in such an abstract way. I need to physically see the problem and then I have a brain wave. I start thinking about Spirograph. I could imagine that instead of allowing the increases to stack up on top of each other I merely needed to move them one increment, one notch, one stitch to the right. It may not be THE perfect solution but what it gave me was quite unexpected. 

It helps to use a stitch-marker at the start of each round so that you know when you have reached the end of that round. I've added a chart of the first few rounds to the pattern, so that you can see what it is you are doing. Slip-stitches are usually written as dots in crochet charts. It makes Slip-stitch patterns very difficult to read, so I have drawn them as 'l' and 'V' for increases.
    You can follow the pattern for as many rounds as you wish. When you are two rounds away from your chosen size you need to do something different. Those increases leave a little bump on the final round which we need to smooth out. So, on the penultimate round I recommend that you work an even round of slip-stitches without any increases.
I like to work an edging row to properly finish off my rugs and mats. For the final round I find that 'inverse Back Loop' stitches work really well. I am finally beginning to understand how these intriguing slip-stitches work so I think I need to explain the physics to you as they are quite different to normal crochet stitches.

    A standard crochet stitch has a vertical stem and the top of the stitch sits horizontally on the top, just like the little symbol we use to identify it. But the slip stitch has no stem so the top of the stitch falls to the front of the work. It also means that the last round you've made sits bunched up on the previous round until the a new round is made. It means that the work begins to curl. The solution is the inverse stitch where the top of the stitch falls to the back of the work. Here's how to work the inverse back loop stitch...  
Bring the working yarn to the front of the work...
Insert the hook through the back loop, from back to front...
Yarn under the hook and pull through both the stitch and the loop on the hook.

    All difficulties are now solved. Using the same Super chunky rug yarn from Woolyknit that I used in my last rugs but this time with a smaller 12mm hook I was able to make 43 rounds with increases, followed by the even round and finished on the 45th round with inverse back loop stitches. It all sounds terribly easy doesn't it? But, even as I needle joined my last stitch I still had my heart in my mouth. It wasn't entirely flat. After washing I laid out every single blocking mat I had and relying on my new found belief in the physics of slip-stitches I blocked the rug. I realised that I had to increase the diameter of the rug to match it's circumference. I stretched the rug out from the centre to open up those bunched up rounds, until the rug lay flat and round.

    I am sharing the pattern with you so that you can play with the design. It doesn't have to be a rug, it could be anything from a coaster to a cushion cover. It does need to be made in a block-able fabric and you will have to work out what hook size works best for your yarn. I have given you over 50 rounds, I am confident that you will see how to add even more rounds if you wish. Don't forget to make the final two rounds without increases.

    Here's the link to the PDF pattern.

Fastening off...


Thursday 15 September 2022

Crochet Slip-stitch in the round.

Continuing my mini Slip-stitch series this month I've been looking at Slip-stitch designs worked in the round. This is the sort of work which is more usually known as Shepherd's knitting or Bosnian crochet. 
All the designs I am going to show you are worked in continuous rounds. If you've never worked a Slip-stitch fabric before you'll find all the information you need to get going in this post, How to Crochet Slip-stitch. Shall we get started?
 
Shepherd's Knitting
Or Back-Loop Only Slip-st is a fairly stable stitch with little stretch. The fabric pattern is created by the unused front loops.
Set up your foundation by working a row of Chain, any number. Do not join the chain row into a loop, instead Slip-st into the Back-Bump of the very first chain to form a loop. This is your first stitch so don't tighten it as you would normally. Slip-st into the Back-Bump of each chain to the end. You are now ready to begin the pattern.
Slip-stitch into the Back-Loop Only of each stitch working in continuous rounds.

 
Flat Stitch
Or Front-Loop Only Slip-st. 
 
It's very similar to the version (right) which is worked in rows except that it creates a more uniform diagonal design and just like that stitch it really wants to roll itself up vertically. This makes it useful for rolled cuffs and hems or hat brims.
After making a foundation of any number of stitches, Slip-st into the Front-Loop Only working in continuous rounds.

Horizontal Stripes
By working alternate rounds of Back-Loop Only and Front-Loop Only Slip-st you can create stripes. I've varied the number of rounds in each stripe to give you an idea of what can be achieved.
Begin with a foundation of any number of stitches. Work in continuous rounds. In my sample I have begun with 4 rounds Back-Loop Only, 4 rounds Front-Loop Only.

Diagonal Stripes
The Problem with one directional crochet is that as the stitches sit on top of each other obliquely, so if you attempt to work vertical stripes this is what you end up with. The pattern naturally leans to the right, unless you are a left-handed crocheter and then you will have a left-handed lean!
In this sample my stripes each have 5 stitches so the number of stitches in my foundation was divisible by 10. I simply repeated (5 Back-Loop Only, 5 Front-Loop Only) continuously around.

One Colour Bosnian Braid
This design and the next are based on the ones in Therese De Dillmont's Encyclopedia of Needlework. 
Due to that right leaning nature of one way crochet, if you try to create a flat strip of braid working in rows in one direction only, the ends will end up diagonal rather than square. So should you want to make a braid for a strap or belt then I suggest that you work in a continuous loop and cut the braid open at one end when it is finished. You will need to seam or seal the ends in some way. Of course you can also use the pattern on a garment worked in the round.
For this example I set up my foundation using a multiple of 6 stitches.
    Round 1&2: Slip-st in back-loop only.
    Round 3&4: Slip-st in front-loop only.
    Round 5&6: Back-loop only.
    Round 7 to 14: (Back-loop only in next 3 stitches, Front-loop only in next 3 stitches) repeat around. Begin each new round one stitch later so that the strips lean to the left. (Or to the right if you are a leftie!)
    Round 15&16: Back-loop only.
    Round 17&18: Front-loop only.
    Round 19: Back-loop only around and fasten off.
 
Two Colour Bosnian Braid
By using colour-work techniques to create a design and with the unused threads carried behind the work we can create a very stable, hard-wearing and thick design as is done in Korsnas sweaters. This design is also based on one in De Dillmont's Encyclopedia. You will notice how some of the design leans to the right and some to the left. To get the design to lean to the left those rounds are started one stitch to the left. I have achieved this by adding in an extra stitch at the start of those rounds.
The design is worked entirely in Back-Loop Only Slip-st. Here's what I did:
Create a foundation using a multiple of 18. [As I was trying to replicate De Dillmont's design I made life difficult for myself. The two parts of the pattern have a different stitch repeat. I could of course have changed the pattern on rounds 3,4&5 to be multiples of 6. As it is written here, on the last repeat on Round 3,4&5 adjust the number of ColA stitches to make up for the odd stitch count.]
    Round 1&2: with ColA Back-Loop Only around.
    Round 3,4&5: (with ColA 3 sts, with ColB 2 sts) repeat around.
    Round 6,7&8: with ColA Back-Loop Only around.
    Round 9,10&11: with ColB Back-Loop Only around.
    Round 12: (ColB 3sts, ColA 3sts, ColB 3sts, ColA 9sts) repeat around.
    Round 13&14: (ColB 4sts, ColA 3sts, ColB 3sts, ColA 9sts) once only, (ColB 3sts, ColA 3sts, ColB 3sts, ColA 9sts) repeat around.
    Round 15,16&17: (ColB 4sts, ColA 3sts) once only, (ColB 3sts, ColA 3sts) repeat around.
    Round 18,19&20: (ColB 4sts, ColA 3sts, ColB 3sts, ColA 9sts) once only, (ColB 3sts, ColA 3sts, ColB 3sts, ColA 9sts) repeat around.
    Round 21,22&23: with ColB Back-Loop Only around.
De Dillmont's design now finishes with a repeat of Rounds 1to 8 but I'd had quite enough of colour-work by this point!

Diagonal Weave
The lovely faux woven texture in this sample is simply made by alternating blocks of Diagonal Stripe. In this example blocks are 4 rounds high by 4 stitches wide but you can make the pattern any width or height.
In this sample I began with a foundation using a multiple of 8 stitches.
    Round 1 to 5: (Front-Loop Only x 4sts, Back-Loop Only x 4sts) repeat around.
    Round 6 to 9: (Back-Loop Only x 4sts, Front-Loop Only x 4sts) repeat around.
    Round 10 to 13: (Front-Loop Only x 4sts, Back-Loop Only x 4sts) repeat around.
Repeat rows 6 to 13 to desired length.
 
Stairway to Heaven
I was clearly feeling creative when I named this. It is simply a one stitch wide diagonal stripe but I think it is my favourite pattern in these examples.
To make it begin with a foundation of even numbered stitches.
(Front-Loop only in the next stitch, Back-Loop only in the next stitch) repeat around continuously.

Twill Weave
I thought I had finished this post when an obvious variant to 'Stairway to Heaven' popped into my head and I just had to try it. It's exactly the same but made over an odd number of stitches. This makes the diagonal stripe lean in the other direction. The fabric lies a little flatter without the diagonal ribbing effect of the stairway pattern.
Begin with an odd numbered foundation.
(Front-Loop only in the next stitch, Back-Loop only in the next stitch) repeat around.
Continue working continuously to the desired length.

Under the Board Walk
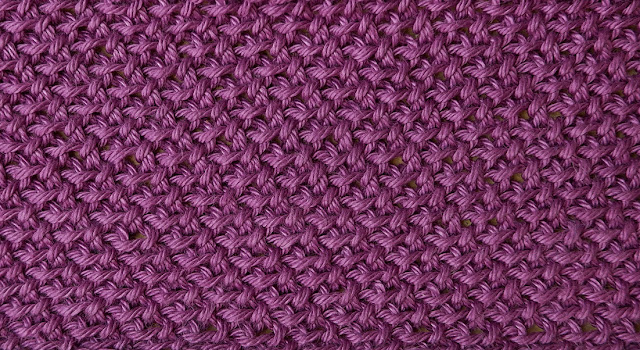
I have had a few attempts at creating patterns using inverse Slip-stitches unsuccessfully. I tried to recreate Garter stitch in the round, instead, this is what I ended up with. It actually looks like Inverse Garter stitch on the reverse side, but I like the pattern that I have achieved. The fabric lies very flat.
There was also much discussion about what to name this stitch. My crochet-confident was adamant the name should express the churning waves. Should you know different then please put us both out of our misery!
Start with a foundation using any number of stitches.
    Round 1: inverse Back-Loop Only in each stitch around.
    Round2:  Front-Loop Only in each stitch around.
Continue alternating these two rounds to the desired length. 
 
I am absolutely sure that there are plenty of other stitch combinations and patterns for me still to discover.
 
Fastening off...