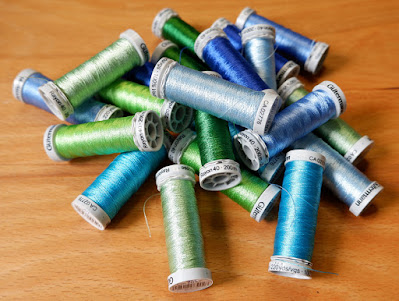
The next challenge was the hook size. The book tells me to use a 1.3mm hook, not having that size I went with 1.25mm.
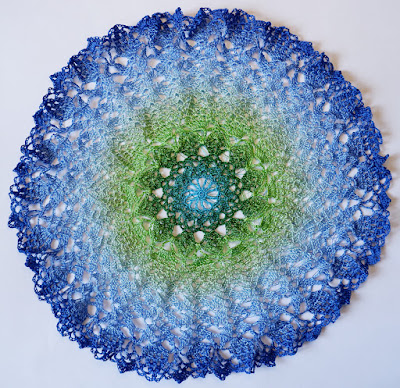
Some time later...I finished the D'oyley. (I have recently discovered that doilies used to be called D'oyley because they were first made by the D'oyley family!) The finished product was a lot less impressive and much smaller than I was hoping for. The threads are so fine that they carry very little presence so that this lacy design feels as if it will blow away in the wind.
What I learnt was that the Turquoise in the centre really doesn't work does it? I think the colour changes too quickly, it would have been much better to use less colours so that the individual colours had more impact. Despite using spray starch the fabric remained far too flimsy.When it comes to crochet I refuse to be defeated. (I wish I was this determined in more areas of my life!) Here comes D'oyley Mark2. Learning from Mark1 I looked for a larger and more solid design this time. Dropping the Turquoise and allowing the colour changes to be slower, I think you will agree the result is much more successful. I again used spray starch when I blocked it but this time I was very generous with it's application!This time because the centre was much more solid I had trouble getting going with that tiny hook. I broke all crochet rules and moved up to a 1.5mm hook just for those first few rounds. Then I went back to the 1.25mm. It shouldn't have worked but it did. Perhaps it's my personal crochet style, maybe in my anxiety I was gripping those threads far too tightly in the beginning, but I got away with it! Having finished the design however I decided that I really didn't like that very dark centre. It feels like a bull's eye in the middle. So perhaps moving from dark to light to dark isn't a good idea?Winking at me in the corner of my eye, as I sit here, is a version of LillaBjorn's April Showers Mandala. It combines Overlay Crochet and lace work. I can't imagine working Overlay in sewing thread, either my eyes or my hands will give out, but what if I was to recreate it in cotton thread? Here comes D'oyley Mark3!
This time I used Anchor Freccia No12 crochet thread and a 3.5mm hook. The thread is readily available in various colour. So I selected two colours which would only be used in the Overlay section and on the edge, plus 6 colours to 'paint' with over the lacy section.I really need to explain how the painted crochet works, don't I! You start with three threads of the same colour and over subsequent rounds you swap out one thread and introduce a thread of the next colour in the sequence. The maths seemed a bit strange to me until I wrote down the colour sequence. Let's say you have 4 colours then there will be 3 colour changes for each of 3 colours plus one for the fourth colour. That's 9 colour changes plus 1. Let me show you how that works. Let's call our colours A,B,C & D. So we will start with AAA, followed by AAB, ABB, BBB, BBC, BCC, CCC, CCD, CDD, DDD. This means we divide the number of rounds by 10. If I have 30 rounds I use each colour combination for 3 rounds. Life never works out this simply though does it!I spent an awful lot of time to-ing and fro-ing and changing my mind. I needn't have worried. This technique is very forgiving, colours that I wasn't sure about blended together beautifully. Magically the change between the greens and blues landed in just the right place. I would really like to take credit for a carefully thought out project, but in truth it was shear luck!This project needed blocking but has enough weight that it doesn't need starch. As I'm intending to gift the finished Mandala it occurred to me to find out if the thread motifs will need blocking every time they are washed. While the Freccia thread is 100% cotton, the embroidery thread is Rayon. Cotton holds it's blocking very well but rayon is more like silk. So I rewashed the first D'oyley and discovered that while it holds it's shape to some extent it still needed blocking again.Now that I had started asking myself questions I wondered if I had to use three threads, why not two or four? I had already made this little motif (above) some time ago using two Freccia threads held together.So now I tried to make Doris Chan's Entropy using four threads held together. I also chose to give that turquoise another go. Using 4 threads means that the colours change much more slowly. By now I had realised that leaving all the ends until the end before sewing them in is a good idea. If you make a mistake and have to pull out a previous round this makes it much easier. Although all those ends look scary, when you have finally finished you are only trying to hide one thread at the start and one thread at the beginning of each round.The four threads gives the D'oyley more weight, and the 1.75mm hook makes the work easier. Along with the fact that Doris design has some weight to it with lots of clusters and Treble stitches (Dc-US), even before blocking the mandala looks good.I hope you can tell by how carried away I got with this months Blog post that I really enjoyed painted crochet! I hope you will try it too.
Fastening off...


