Search This Blog

Tuesday, 15 February 2022

Long Hook Crochet Techniques: What is Crochenit?


I started writing these Long Hook crochet posts because I was so confused by all the different techniques. Some bloggers will lead you to believe they are all the same technique. I decided that there was only one way to find out. 
CrochenitTM is a reversible Tunisian crochet method which was invented by Mary Middleton in the 1970's. It came to international attention at the beginning of this century. The three things that distinguish Crochenit from other types of crochet are: that it uses a double-ended hook, is reversible, and uses two balls of yarn. This makes it perfect for colour-work.
 
Let's start by showing you how it works. I am going to demonstrate Tunisian Simple stitch worked in Crochenit. 
 
Foundation:
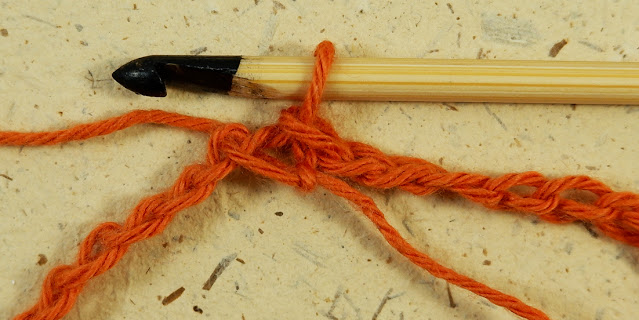
Start exactly as you would for Tunisian Simple Stitch by making as many chain as stitches required. 
Then pull up a loop in the second chain from the hook and in each stitch across.
Row1:
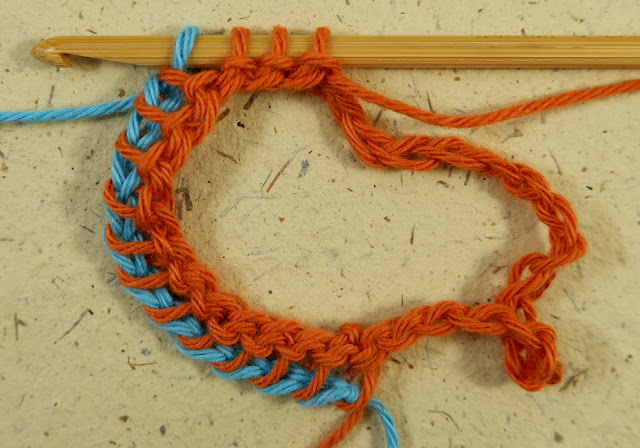
Turn the hook, sliding all the stitches to the opposite end. With the second colour make a slip knot and place the loop on the hook.
Pull the loop through the first stitch on the hook.
Yarn over and pull through the next two loops, repeat to the end of the row. [In Tunisian crochet this would be referred to as the Return Pass but in Crochenit it is classed as a  separate row.]
Row2:
Working forward again, the loop on the hook counts as the first stitch. Place the hook under the next vertical bar from right to left, yarn over the hook and pull a loop through.
Pull up a loop under each bar to the end. 
Turn the hook and slide all the stitches to the opposite end. 
Each colour is used to work two rows before the hook is turned. It seems complicated but in practice it's easy to remember when to turn the hook. Additionally, if you turn the hook alternately clockwise and anti clockwise there is no need to keep swapping the yarn balls from side to side.
Row3:
Pick up the other colour, yarn over and pull through the first loop only,
Yarn over and pull through two loops, repeat to the end of the row working the stitches off the hook.
Repeat rows 2 and three to the desired length. 
At the end you can either fasten off after working a 'row3' or slip stitch across using the vertical bars after a 'row3'. I showed you how to do this in a previous post on Tunisian crochet.
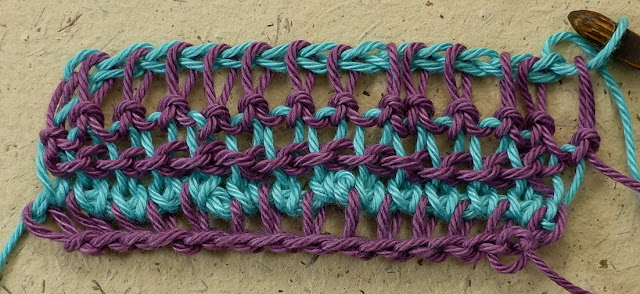
We can compare the Tunisian Simple Stitch sample and this one made with Crochenit. Besides being reversible the Crochenit is also lighter in weight and slightly ribbed.
 
Unfortunately patterns and pattern books are hard to find in the UK.  The booklet that I have includes three patterns. They introduced me to a stitch called a High stitch which is made like this.
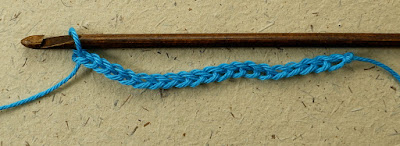
After pulling up a loop under the horizontal chains...
...Yarn over and pull through the loop on hook to create a chain1.
Alternately you can pull up a loop under the vertical bar, then yarn over and pull through the loop on hook to create a chain1.
 
I made this swatch exactly like Simple Stitch but replaced the normal Row2 with a row of High stitches. 
 
I made this swatch by alternating High stitch and Simple Stitch on Row2. And alternating Simple stitch and High stitch on Row4.
 
I tried experimenting with other Tunisian stitches with mixed success.  But this was my favourite, it is a slight variant on an existing Tunisian stitch that I'd found.
 
Foundation row:
Chain a multiple of 2 stitches plus an additional 2 stitches. 
Pull up a loop in 2nd chain from the hook and in each stitch to the end, Chain1 and  turn.
Row1. 
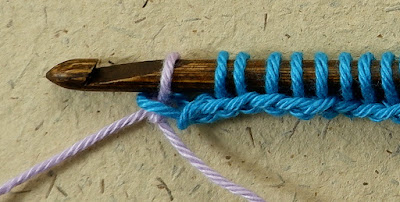
Attach new colour to the hook with a slip knot, pull through the first stitch.
(Yarn over and pull through 3 loops on the hook.) repeat to the last two stitches. Yarn over and pull through last two loops on hook.
Row2.
 Chain1, (Place hook into chain space, yarn over and pull through a loop, Chain1, place hook under next 2 vertical bars together, yarn over and pull through a loop) repeat to last chain space, skip last space, pull up a loop in last vertical bar, Chain1, Turn.
Row3.
Pick up the other colour, pull up a loop in first stitch, (Yarn over and pull through 3 loops on hook,)  repeat to last 2 stitches on hook, yarn over and pull through last two loops on hook.
Repeat rows 2 and 3 to desired length.
 
I am now convinced that if you enjoy Tunisian crochet and would like a new challenge then you should be able to work out some original patterns of your own. I can attest to how satisfying it is!
 
Fastening off... 


Saturday, 15 January 2022

Long Hook Crochet Techniques: Tunisian Crochet in the Round - Spiral.

 
Oh dear! This was not the post I had planned for you but I seem to have fallen down a Tunisian crochet rabbit hole. So in an effort to keep things logical this month I am going to show you how to Tunisian crochet in a continuous spiral.

This is a way to Tunisian crochet in the round with a single short hook. It's so marvellously easy! You can work any stitch of your choice, but I am keeping things simple by demonstrating with Tunisian Simple Stitch. The details for how to work this stitch are in last months post.
All you need is a doubled ended crochet hook and two balls of yarn. Of course they can be the same colour, or you can use two different colours as I am doing. I have also painted one end of the hook so that it is obvious which end I am using. The hook is a 15cm long Clover double ended hook.
So let's get started.
We begin by making a length of chain with one chain per stitch required.
To join, place the hook under the back bump of the first chain stitch. Be careful to make sure the chain isn't twisted.
Yarn over the hook and pull through that first chain and the loop on the hook. This is your first stitch.
Pull up a loop in each chain stitch until the hook is comfortably full. Don't try to put too many stitches on the hook.
Now slide the stitches down to the opposite end of the hook and turn the work.
Attach your second ball of yarn to the hook with a slip knot.
Pull the loop through the first stitch on the hook.
Yarn over and pull through two loops on the hook.
Continue working the return pass (repeat the last step) until there are just three stitches left on the hook.
Leaving these three stitches helps to maintain a good working tension throughout.
Slide the work back to the opposite end of the hook, turn and continue to pick up stitches. If, every time you turn the work, you turn alternately clockwise and anti clockwise this will stop the working yarns from getting tangled and you won't need to swap the yarn balls from one side to the other.
Pick up as many stitches as you feel comfortable with, then slide to the opposite end of the hook and turn once more. Work off these stitches until only three remain.
Continue to pick up and work off stitches until you the end of the round.
At this point simply continue to pick up stitches. As I am working Simple Stitch the hook is now placed under the vertical bar, yarn over and pull the loop through the bar.
Continue the process of picking up stitches, turning...
... and working off stitches until the work reaches the length you require.
I have chosen to work a border of Tunisian Knit stitch before I finished. I merely changed the way I picked up the stitches. When you are ready to finish work off all the remaining stitches until you are left with just a single loop on the hook.
Turn the work and change to the first yarn.
Placing the hook under the next bar, yarn over and pull through both loops on hook to create a slip stitch.
Work a slip stitch into each stitch for a neat finish.
Finish the last stitch by making a needle join and work away both yarn ends at the top. As I was making a pouch for my new Double ended Clover hooks, I turned the case inside out and stitched the end closed.
I finished this one with a nice ribbon woven in and out of the last round. The larger pouch has a length of Lucet cord that I made in the same yarn.

The technique allows any width of Tunisian tube to be made whether it is a sweater or a glove. There is more than one double ended crochet technique so if this is not the one you were expecting maybe it will be next months technique!
 
Fastening off...