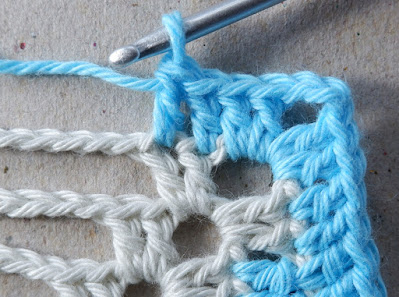
What do you love most about crochet? For me it is discovering a new technique. Last year I wrote a post about 50 different types of crochet and here I am not twelve months later with one I missed off the list. That actually makes me surprisingly happy!
So what is Waterfall crochet? Like water falling over a cliff edge, the stitches fall down over the work. It's different from both spike stitches and overlay crochet. So let me show you how it works.You start with a skeleton of treble stitches (Dc-USA) and chain spaces. Then starting from the outer/top row, the stitches drop down through the chain spaces and attach to a treble stitch below. Even the longest of the drops is made as a single stitch. This enables you to insert another colour into a row without any of the usual colour-work techniques.
The important things to know are, that your working thread always stays at the back of your work and encapsulates the chain stitches, and that you will need a hook with a long, straight shaft. Try using a bamboo hook, a double ended hook or a Tunisian hook. For the following tutorial I managed to use a normal Clover hook because I was using 4ply yarn.
The important things to know are, that your working thread always stays at the back of your work and encapsulates the chain stitches, and that you will need a hook with a long, straight shaft. Try using a bamboo hook, a double ended hook or a Tunisian hook. For the following tutorial I managed to use a normal Clover hook because I was using 4ply yarn.
The stitches are abbreviated as 'W' plus a number. The number refers to the length of the stitch. So, W2 is a treble stitch plus one chain space. A W3 is a treble stitch plus two chain spaces and so on.In this design we begin with Treble stitches (Dc-US). The first waterfall stitch is a W2.First we need to load the hook with all the 'yarn overs' we will need. Yarn over the hook for the Treble;Place the hook into the first chain space and yarn over the hook twice. You will do this for each of your chain spaces, but this time we only have one space.Bring the hook back through the chain space, to the front of the work, and place the hook into the Treble stitch below.Yarn over the hook and bring the loop through to the front. The loops are now worked off the hook from the back.So turn or flip the work to see the back. Yarn over the hook and pull through the first 2 loops on your hook.
Yarn over the hook again, this time pull through the next 2 loops on the hook and past the chain stitch.Now you have reached the Treble stitch at the top. So (yarn over and pull through 2 loops) twice, just as you would normally.
Yarn over the hook again, this time pull through the next 2 loops on the hook and past the chain stitch.Now you have reached the Treble stitch at the top. So (yarn over and pull through 2 loops) twice, just as you would normally.
Your first W2 stitch is completed.
For a W3 you would load your hook in the same way for each chain space.
Because the stitches are made over the chain stitches you will have to straighten them up from time to time.
Because the stitches are made over the chain stitches you will have to straighten them up from time to time.
I experienced quite a big learning curve with this technique. I had to find a comfortable way to hold the work and the hook, as well as learning to control my tension. As with anything, practise makes perfect!
On the plus side, I like the low relief it creates and the look of a woven fabric, it reminds me of basketry. There is a bonus in that it creates a solid fabric with none of the free standing or loose stitches you find in overlay crochet. A definite bonus is the lack of yarn ends you're left with and no juggling with balls of yarn!
All the designs in this post were taken from an Annie's Crochet publication, Waterfall Crochet Granny Squares by Joanne C. Gonzalez.


