I have been crocheting for over ten years and must be, by any definition, an experienced crocheter. And yet, the foundation of my crochet world has just shook. In my rush to learn everything it seems I have missed a basic understanding of crochet anatomy. I'm talking about the Live Loop or Golden Loop.
Let me explain!
When we are crocheting a Double Crochet (Sc-US) we begin with a loop on the hook. This loop will become the top of our next Dc.

Then we pull up a loop in the next stitch. This is the golden loop. This becomes the post of our Dc. The height of this loop determines the height of our finished stitch.

Next we have to join the post and top loops to complete the stitch. To do this we 'yarn over' and pull that loop through both the post-loop and top-loop.
 Our Dc is completed. And the loop on the hook becomes the top of the next stitch.
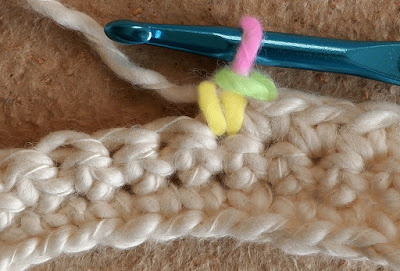


But, what if we don't make that final stage?
What if we pull that final loop through just the post-loop?

We have created a Live Loop. A stitch which is still 'live' because it is not completed.
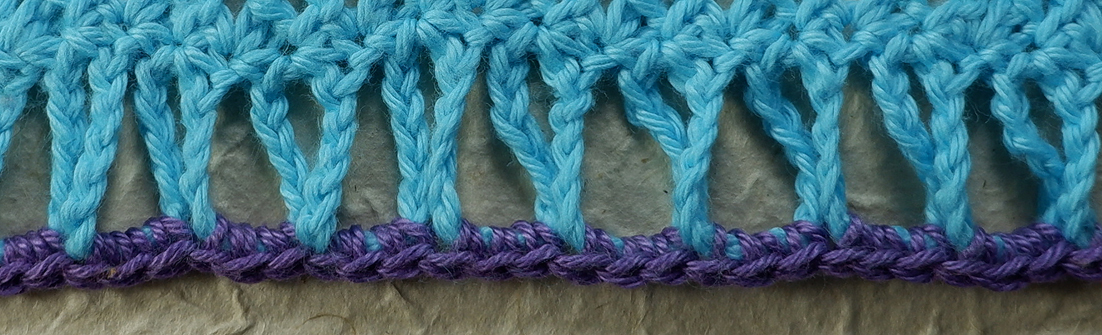
Look we can create a whole row of 'live-loops'...

Then remove the hook and finish each in turn simply by pulling the live-loop through the preceding stitch.


Sometimes the best ideas are the simplest. Grounded in a thorough understanding of the physics of crochet, Sue Perez, aka Mrs Micawber, has found a way to create cable stitches using live-loops. She published her book, Live Loop Cables in Crochet, in 2020 and I have been putting off learning this skill for no good reason I can think of! Sue Knits and crochets, I think this idea is derived from her knowledge of both crafts. I am not a knitter and I am a little over awed by the whole idea!
Fortunately, Sue has made this handy video for us. She explains it all so much better than I ever can!

I made this using the Practice Swatch.
Working in the round, from the front only, the cables are straight forward and prove no difficulty.
 |
| Block One: Straight Cables |
Working in rows, from the back and front, the cables are a little different and require more attention. There seems to be a lot of information at the beginning of the book which you might find off putting. Don't panic! The stitch patterns are organised in a systematic way. If you work through them, one by one, your skills will develop in easy steps. At the start of each new design you are told what you will learn and where, in the book, you will find the technical information.
 |
| Block Two: Meeting in the Middle |
There are 25 stitch designs which each form a patchwork block. You can use the blocks to make the scarf in the pattern section. Or you could make one of the other ten patterns which are varied and interesting.
 |
| Block Three: Travelling Cables |
In my first attempt at these cables I failed miserably! There is a lot to take on board, and, like a bad workman I blamed my tools. Sue recommends we begin with a worsted weight yarn and at least a 5mm hook. As a non wool user the right kind of yarn is hard to find. The samples I made here use VeganYarn.Co.UK's Chunky weight Cotton Bouclé.  We also need a stitch marker to park the live loops on. Sue recommends a hair grip bent in a certain way to form a sort of closed 'U' shape. Once I had the right tools and watched Sue's videos, I found I could finally make progress!


What's so good about live loop cables? Well for one thing they can be made to bend in any direction. They are soft and flexible. They can cross and create all of the classic knitted Aran designs. Unlike the post stitch versions they're not heavy or stiff. The cables are, in effect, made on the surface of your fabric, so they don't leave those little holes in the fabric that happen when working with post stitches.
 |
| Block Four: Raised Cables with Bobbles |
Sue's book is still available, so I suggest you grab a copy quick. If you have it already and like me didn't initially make progress. Go on, give it another go!! My advice for using this book would be to gather together some Aran/Worsted weight yarn, large hooks and the stitch markers. Then read through the Chapter on Necessary terms before skipping ahead to the practise swatch. Work your way systematically through the stitch patterns. As you progress you will find your understanding growing. From time to time you may want to refer back to the other information in the book, when Sue directs you to. By the time you get to the projects you will be an expert!
 |
| Block Five: Curved Cables with Popcorns |
At the start I struggled to make the most simple of cables. Indeed, experienced Live-Loopers will spot mistakes in these blocks! But, with each mistake my understanding increases and with each new challenge my skill level rises.
 |
| Block Six: Honeycomb Cables |
It has reminded me of what it was like to learn to crochet in the first place. All of the things I once struggled with; like how to hold the hook and yarn, I no longer give a seconds thought.
 |
| Block Seven: Flat Rope Cables |
I have been recording my progress on my Ravelry page.
Besides, I will continue to add my progress to this blog post, but I
expect you will be wanting a new post next month, so progress may be
intermittent!
 |
| Block Eight: Ropes and Antlers |
Fastening off...

 |
| Block Nine: Simple Crossed Cables |
 |
| Block Ten: Offset Crossed Cables |
 |
| Block Eleven: Double Helix |
 |
| Block Twelve: Twisted Twist |